

Website monetization is a great feeling for a blogger. We can monetize a website in different ways but all require custom code to display ads on websites. Applying codes manually in each and every post on a website is quite terrifying. So, using a WordPress plugin can be a great choice.
Many plugins come with limitations such that using the best plugin can increase our ad visibility. In recent days, Ad Inserter Plugin has become a great choice for website owners. That’s why Today we will discuss the step by step setup guide of Ad Inserter Plugin in WordPress. Let’s get started!
Step-by-Step Guide to Using Ad Inserter Plugin
Ad Inserter is an ad management plugin in WordPress used to place Google Adsense & custom ad codes at optimal positions. It’s a simple and easy to use interface that helps bloggers to place code easily. We can place codes on many positions like:
- Before posting and after posting.
- Before content and after content.
- Before image and after image.
- Before comments and after comments.
- Between comments and paragraphs and many more positions.
Step-1: Install and Activate the Plugin
To set up the ad inserter we need to download it in our WordPress. Follow the instructions given below to make downloading complete.
- Visit WordPress Dashboard.
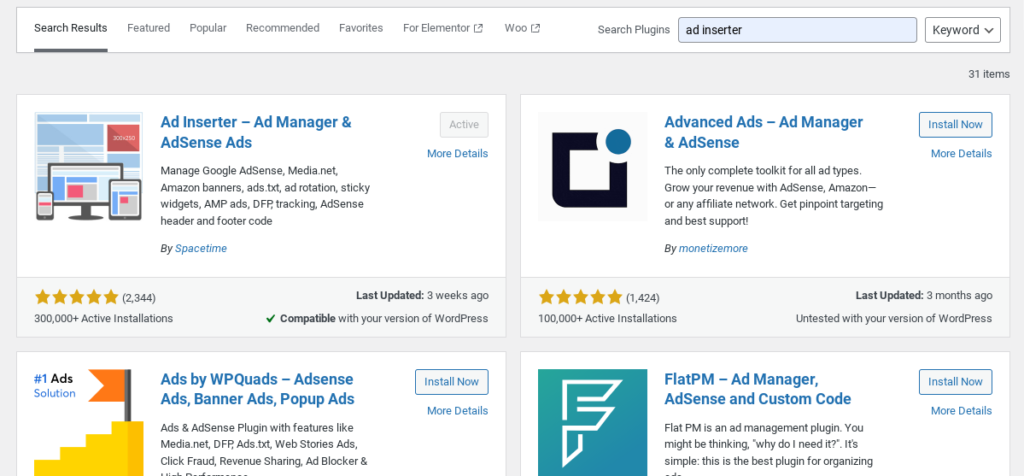
- Go to the Plugin Section & search Ad Inserter.
- We can see a plugin named as “Ad Inserter – Ad Manager & Adsense Ads“.
- Install and activate the plugin.
Hurry! we successfully downloaded the Ad Inserter plugin. We can find it in the Setting Section of our WordPress.
Step-2: Explore Plugin Settings
Well! Now we have to explore plugin settings. In the Setting Section you can see the following options like Header, Footer, Ad Blocking, etc as given in the image.
- Header Section: It helps to include custom code in the <head> </head> section of website.
- Footer Section: It helps to include custom code in the <footer> </footer> section of website.
- Ad Blocking Section: It is used to control where to show ads in the ads on the website. We can block ads with this option.
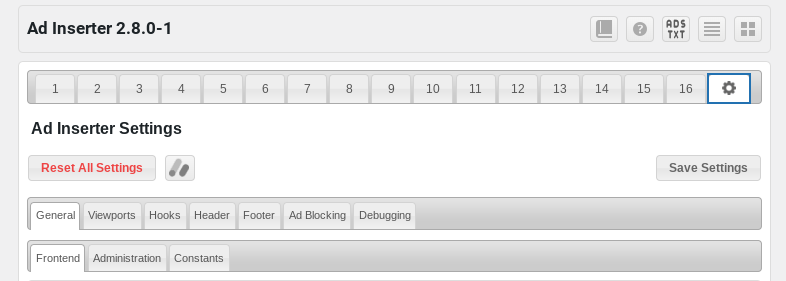
We can see an ADS.TXT box at the top of the setting page. Just click on it and go down. Now we can manage ads.txt manager with this option.
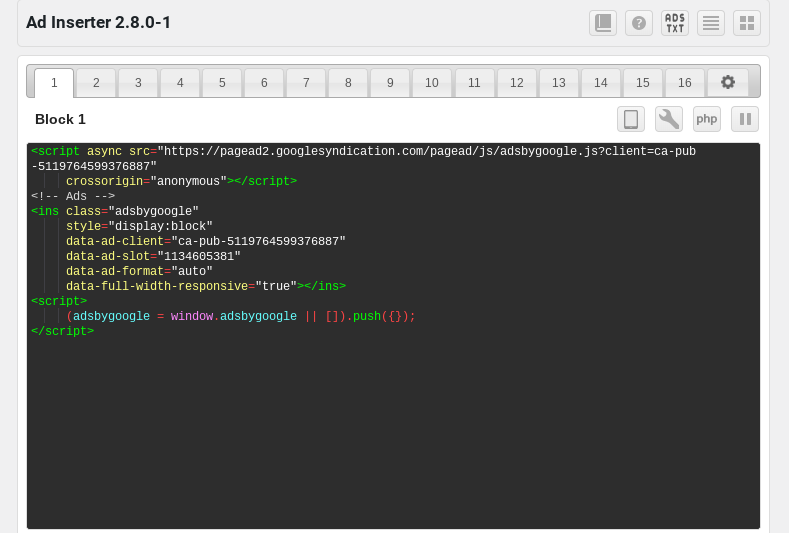
Step-3: Insert Ads
It’s time to add ads on our website. Just put the ad code, and save it. We can add custom code here, Adsense or Adx code.
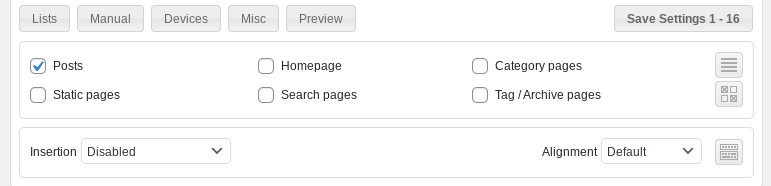
Step-4: All Done!
All Done! Select the position of the ad code, set the alignment and all. After applying all things, save the setting and enjoy monetization.
I hope you will enjoy the Ad Inserter Plugin tutorial.
Conclusion
Ad Inserter Plugin can be a great choice for Web Monetization. Here we have learned about the insertion of the ad codes on websites. If you have any problems or questions please let me know in the comment section. You can explore my website to know more about us and our services.
Thanks for joining us! For any concern or query I am always here to help you.
